Buy British trees from our shop
We have single trees and tree packs to meet your needs, from wildlife to woodfuel. Delivery is free.
Shop now
Citizen science manager
One of my favourite things about Christmas is making a wonderful homemade wreath for the front door. It’s a fun and rewarding activity for adults and children alike! Here are my tips and a step by step guide for how to make a holly wreath from festive foraged materials.
Holly is ideal for creating a long-lived wreath. The leaves are robust and waxy which makes them quite resistant to drying out, so they will last a long time. They are tough and not easily damaged when handled. The main challenge is making sure they don’t damage you with their spines! I'd recommend wearing a really thick pair of protective gloves to prevent scratches.
Of course, holly is the just the start – you can include so many other natural materials, from ivy to mistletoe.
If you are making a wreath with younger family members then some less prickly options may be better.
You can make your wreath in all sorts of different sizes and styles. Try experimenting with different colours and materials. Keep it simple and natural, or decorate it to be bright and showy. Any extras could be hung elsewhere around the house or gifted to loved ones.
Make your wreath as environmentally friendly as possible by:
There are lots of options for the base of your wreath, including:
Other equipment you will need:
You can use lots of types of plant for your wreath. Look in your garden, local market or florist. If you are foraging in the countryside, make sure you have the landowner’s permission and please follow our responsible foraging guidelines. Try to gather reasonably long lengths that can be cut to size later.
We have single trees and tree packs to meet your needs, from wildlife to woodfuel. Delivery is free.
Shop nowAfter preparing your chosen base, use thick string, ribbon or wire to add a strong hanging loop to your wreath.
Measure the thickness of your wreath base.
Cut off a small sprig of holly branch that is about twice the length of the measurement you made in step 2.
If you're using floral oasis
Push the first holly twig into the oasis at about a 45 degree angle to the wreath. Work your way around and then go back to fill in any gaps so no oasis is visible. The oasis wreath base is quite thick, so you'll probably have room for several rows of greenery. Now you can skip straight to step 10.
If you're using a twig, moss or wire ring base
Use floristry wire to attach the first piece at about a 45 degree angle to the wreath. The cut end of the twig should be towards the inside of the wreath. You may need to remove some lower leaves from your twig.
Take a look at the first piece and imagine the finished wreath. Will it be the size you want? Adjust the twig length accordingly and cut your remaining twigs to the same size for consistency around the wreath.
Add the second piece next to the first, also at 45 degrees. Try to hide the cut stem underneath the first piece.
Continue in the same way around the wreath.
Go back and look for gaps or areas where you can see stems poking out. Add in more sprigs of greenery to cover them. This is a good way of using up smaller scraps.
Give your wreath a tidy up by trimming off any leaves or twigs that are oversized or pointing the wrong way.
Add any ribbons and decorations, hang and enjoy.
We'd love to see your finished results – why not share them with us on social media?
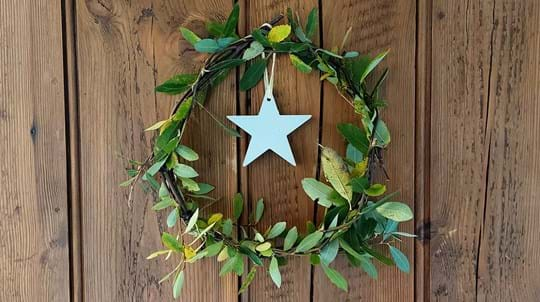
If you're a little more pressed for time or haven't been able to source everything you'll need for the holly wreath above, we also have a guide for making a simple winter wreath from foraged materials. This wreath is also a little smaller, so would fit nicely in the home as well as on your front door.

Visiting woods
See a different side to the woods. From cold, crisp mornings to chilly starlit evenings, discover a winter wonderland near you.

Blog
Annabel Kemp • 07 Nov 2024

Blog
Charlie Mellor • 20 Nov 2020

Blog
Charlie Mellor • 27 Nov 2023

Blog
Helen Keating • 05 Dec 2022

Visiting woods
See what's in season with our guide to sustainable foraging with top tips on how to pick, cook and eat wild plants.

Blog
Hanako Shimada • 23 Dec 2024

Blog
Charlie Mellor • 29 Nov 2018